
 How and where to attach a radio transmitter to a hunting bird are two key decisions that every falconer needs to carefully make.
The Mounting Methods used for attaching transmitters to birds have evolved for many years, and they are constantly improving as we all gain experience and discover new materials.
This summary outlines in one place the advantages and disadvantages, together with the opinions of falconers, about each of the four mounting methods currently in use worldwide.
Click on the tabs to jump to the method you’re now using or interested in, and review the discussion of that method. A Photo Gallery is also included to help you decide what you prefer as you see birds in flight with Marshall transmitters using each of the four mounting methods.
 Ever since transmitters were first attached to falconry birds, the methods of attachment have steadily evolved through trial and error. When a method fails, it can result the loss of the transmitter or worse, the injury, or outright loss or death of the bird. For this reason the subject invokes strong opinions from falconers in terms of which method is ‘best’ or ‘safest’ to use. Most experienced falconers will have decided on the mounting method they currently use due to a personal incident confirming the weakness or risk of one approach vs. another.
In addition to deciding on a particular mounting method, some care and consideration are also required as to its proper use. As Doug Pineo has observed: “Any good telemetry mounting method requires that the user not take shortcuts. They must honor the bird by making sure their mounting methods are not sloppy and making sure bewits are snugly fit, for example, with only the best materials being used.”
It’s also true that some negative opinions have been formed about a particular Mounting Method when in fact it may have been due to other particulars that are now obsolete being at fault, such as using the early 18-inch long antennas of the 70’s used on a tail mount, or a heavy transmitter, that led to the loss of a tail feather. Tail Mounting, in this example, should be re-visited and judged by today’s standards: top of the tail designs, very short antennas, lightweight low-profile transmitters such as the Micro, and the new ability to not have to remove the transmitter after each flight to turn it off and on.
Many falconers tend to follow the lead of their mentor (“Sponsor” in the US), and simply carrying on using the mounting method with the same materials he or she saw used during their apprenticeship. Others are influenced by what their group or local area falconers are using. Marshall Radio Telemetry is in the unique position of being in near constant communication with falconers from all over the world. They request their transmitters to be mounted in one way or another and give us their reasons why.
Under the following Tabs, you’ll find observations about the general risks and advantages of the four primary mounting methods used by falconers today: the leg (or tarsus) mount, the tail mount and the neck mount together with the ‘fourth option,’ which has continued to grow in acceptance over the last six years by falconers around the world: the TrackPack.
Determining Risks and Disadvantages
Two primary reasons to choose one mounting method over another are these:- Safety of the bird. This is the highest priority, limiting physical injury through impact, collision or abrupt removal of the transmitter, and
- The effect on the performance of the transmitter, meaning the loss or degradation of the signal based on how it’s positioned.
After these are the remaining considerations:
- How might it hinder the effectiveness of a hunting bird? Is it out of the way? Areodynamic?
- How easy is it to install and remove? What is the ‘ease-of-use’ for the falconer?
- Also, aesthetics and appearance are important to many. Does it dissappear from view, compliment or intrude?
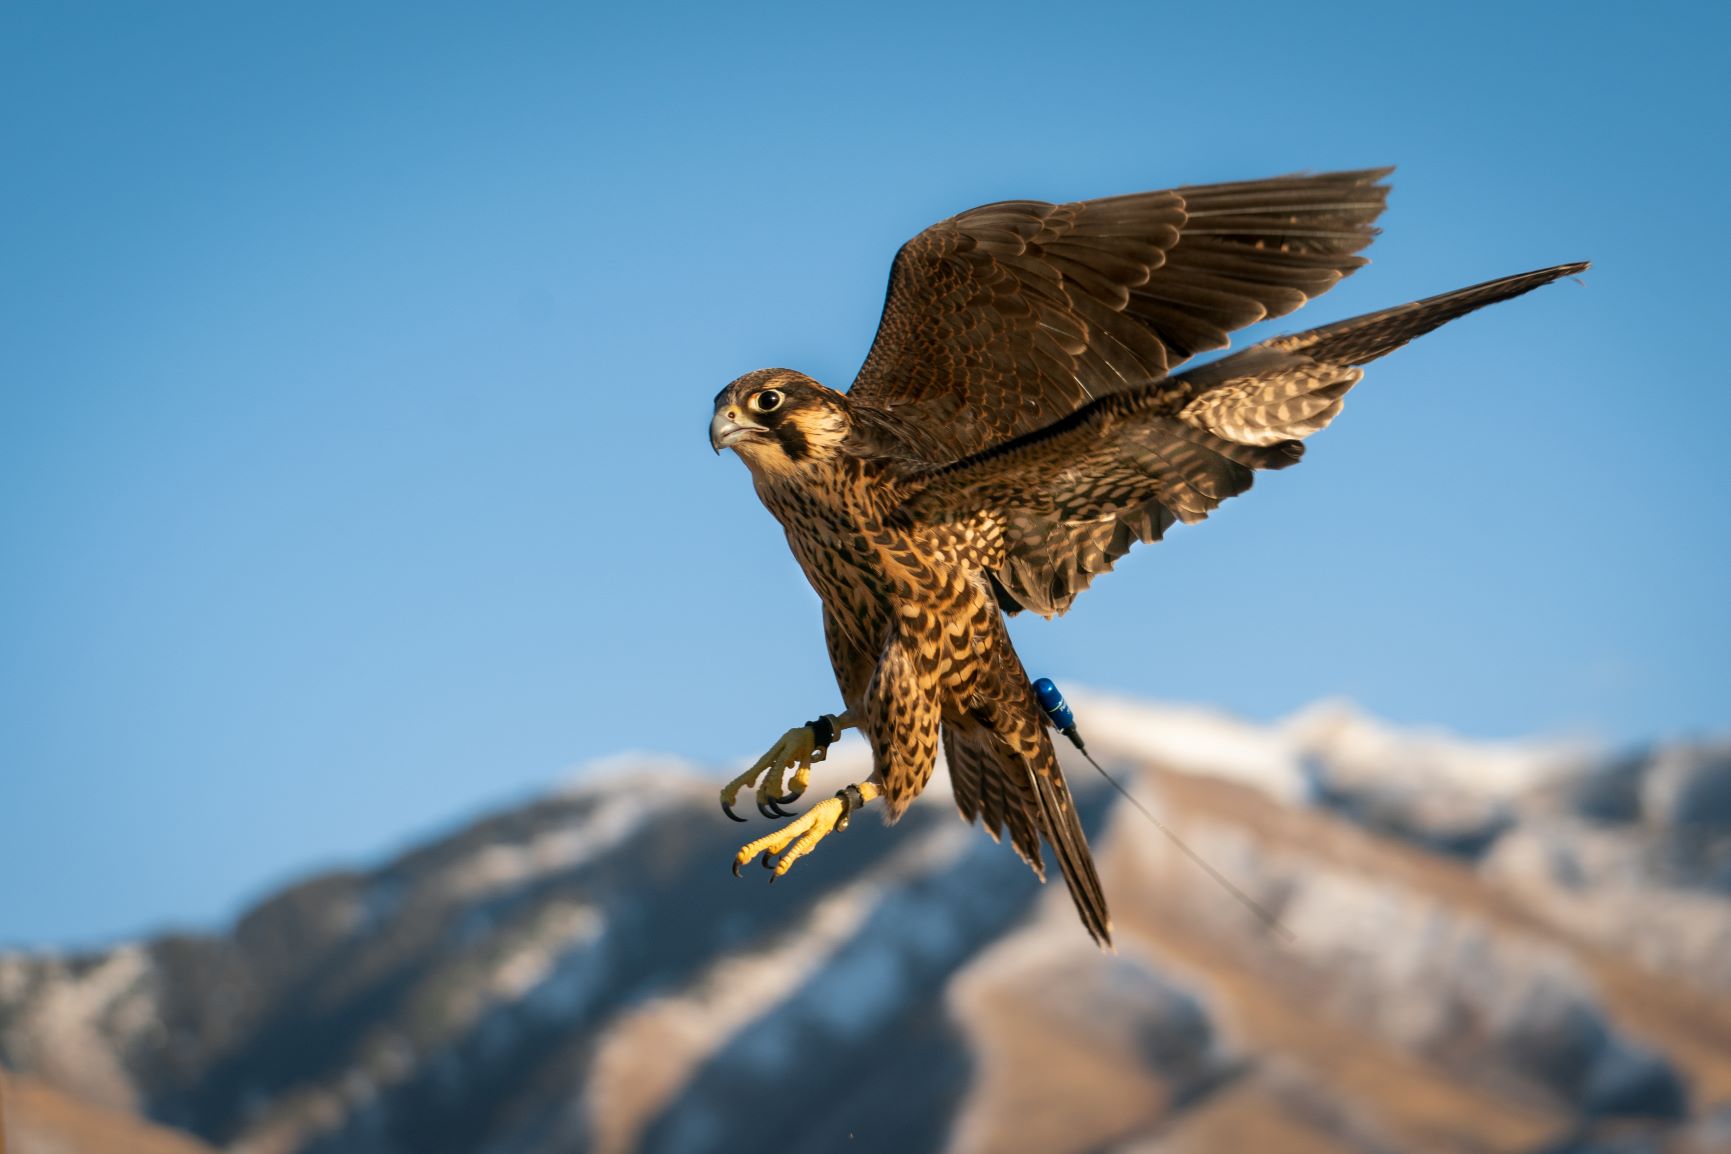
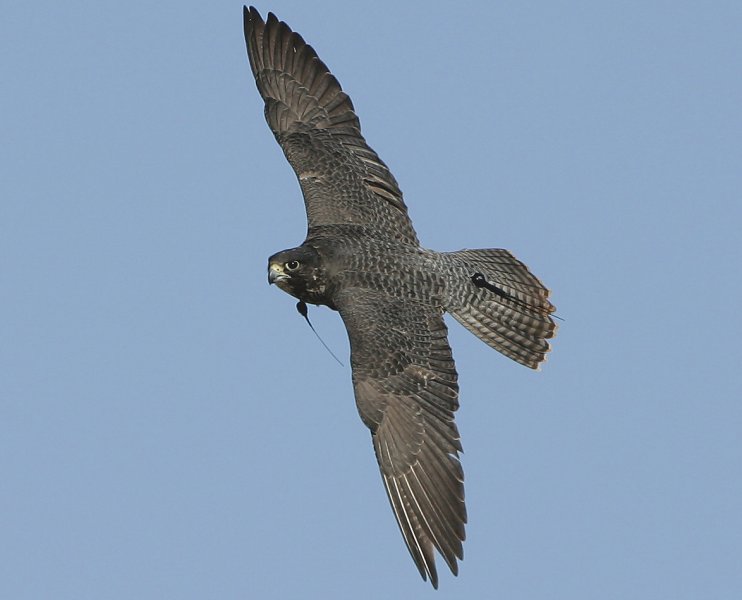
By more closely examining photos of birds in flight and when hunting, we can get visually beyond what the mounting method looks like on the hooded bird on the fist, and be more able to consider its other effects at high speed and in motion.
When you try to identify Advantages, remember they can only be considered to be so relative to the others issues since all mounting methods still contain elements of risk. There is no ‘natural,’ organic or completely safe way to securely attach an external electronic device to an active hunting hawk’s body. It’s a question of reducing the risks.
Will the transmitter be used on a shortwing that crashes through bushes after quarry or a longwing that hits quarry at high speed from a stoop? What method will have the least impact on the bird’s flight, hunting effectiveness and mobility?
What method will pose the least amount of risk for physical injury for the type of Falconry I pursue?
Which method is the quickest and easiest to get on and off with each flight? Or can it be left on?
Which method would give the best performance in most situations? In other words, is there an advantage to how strong or weak the signal will be, based on how it is mounted?
Overview
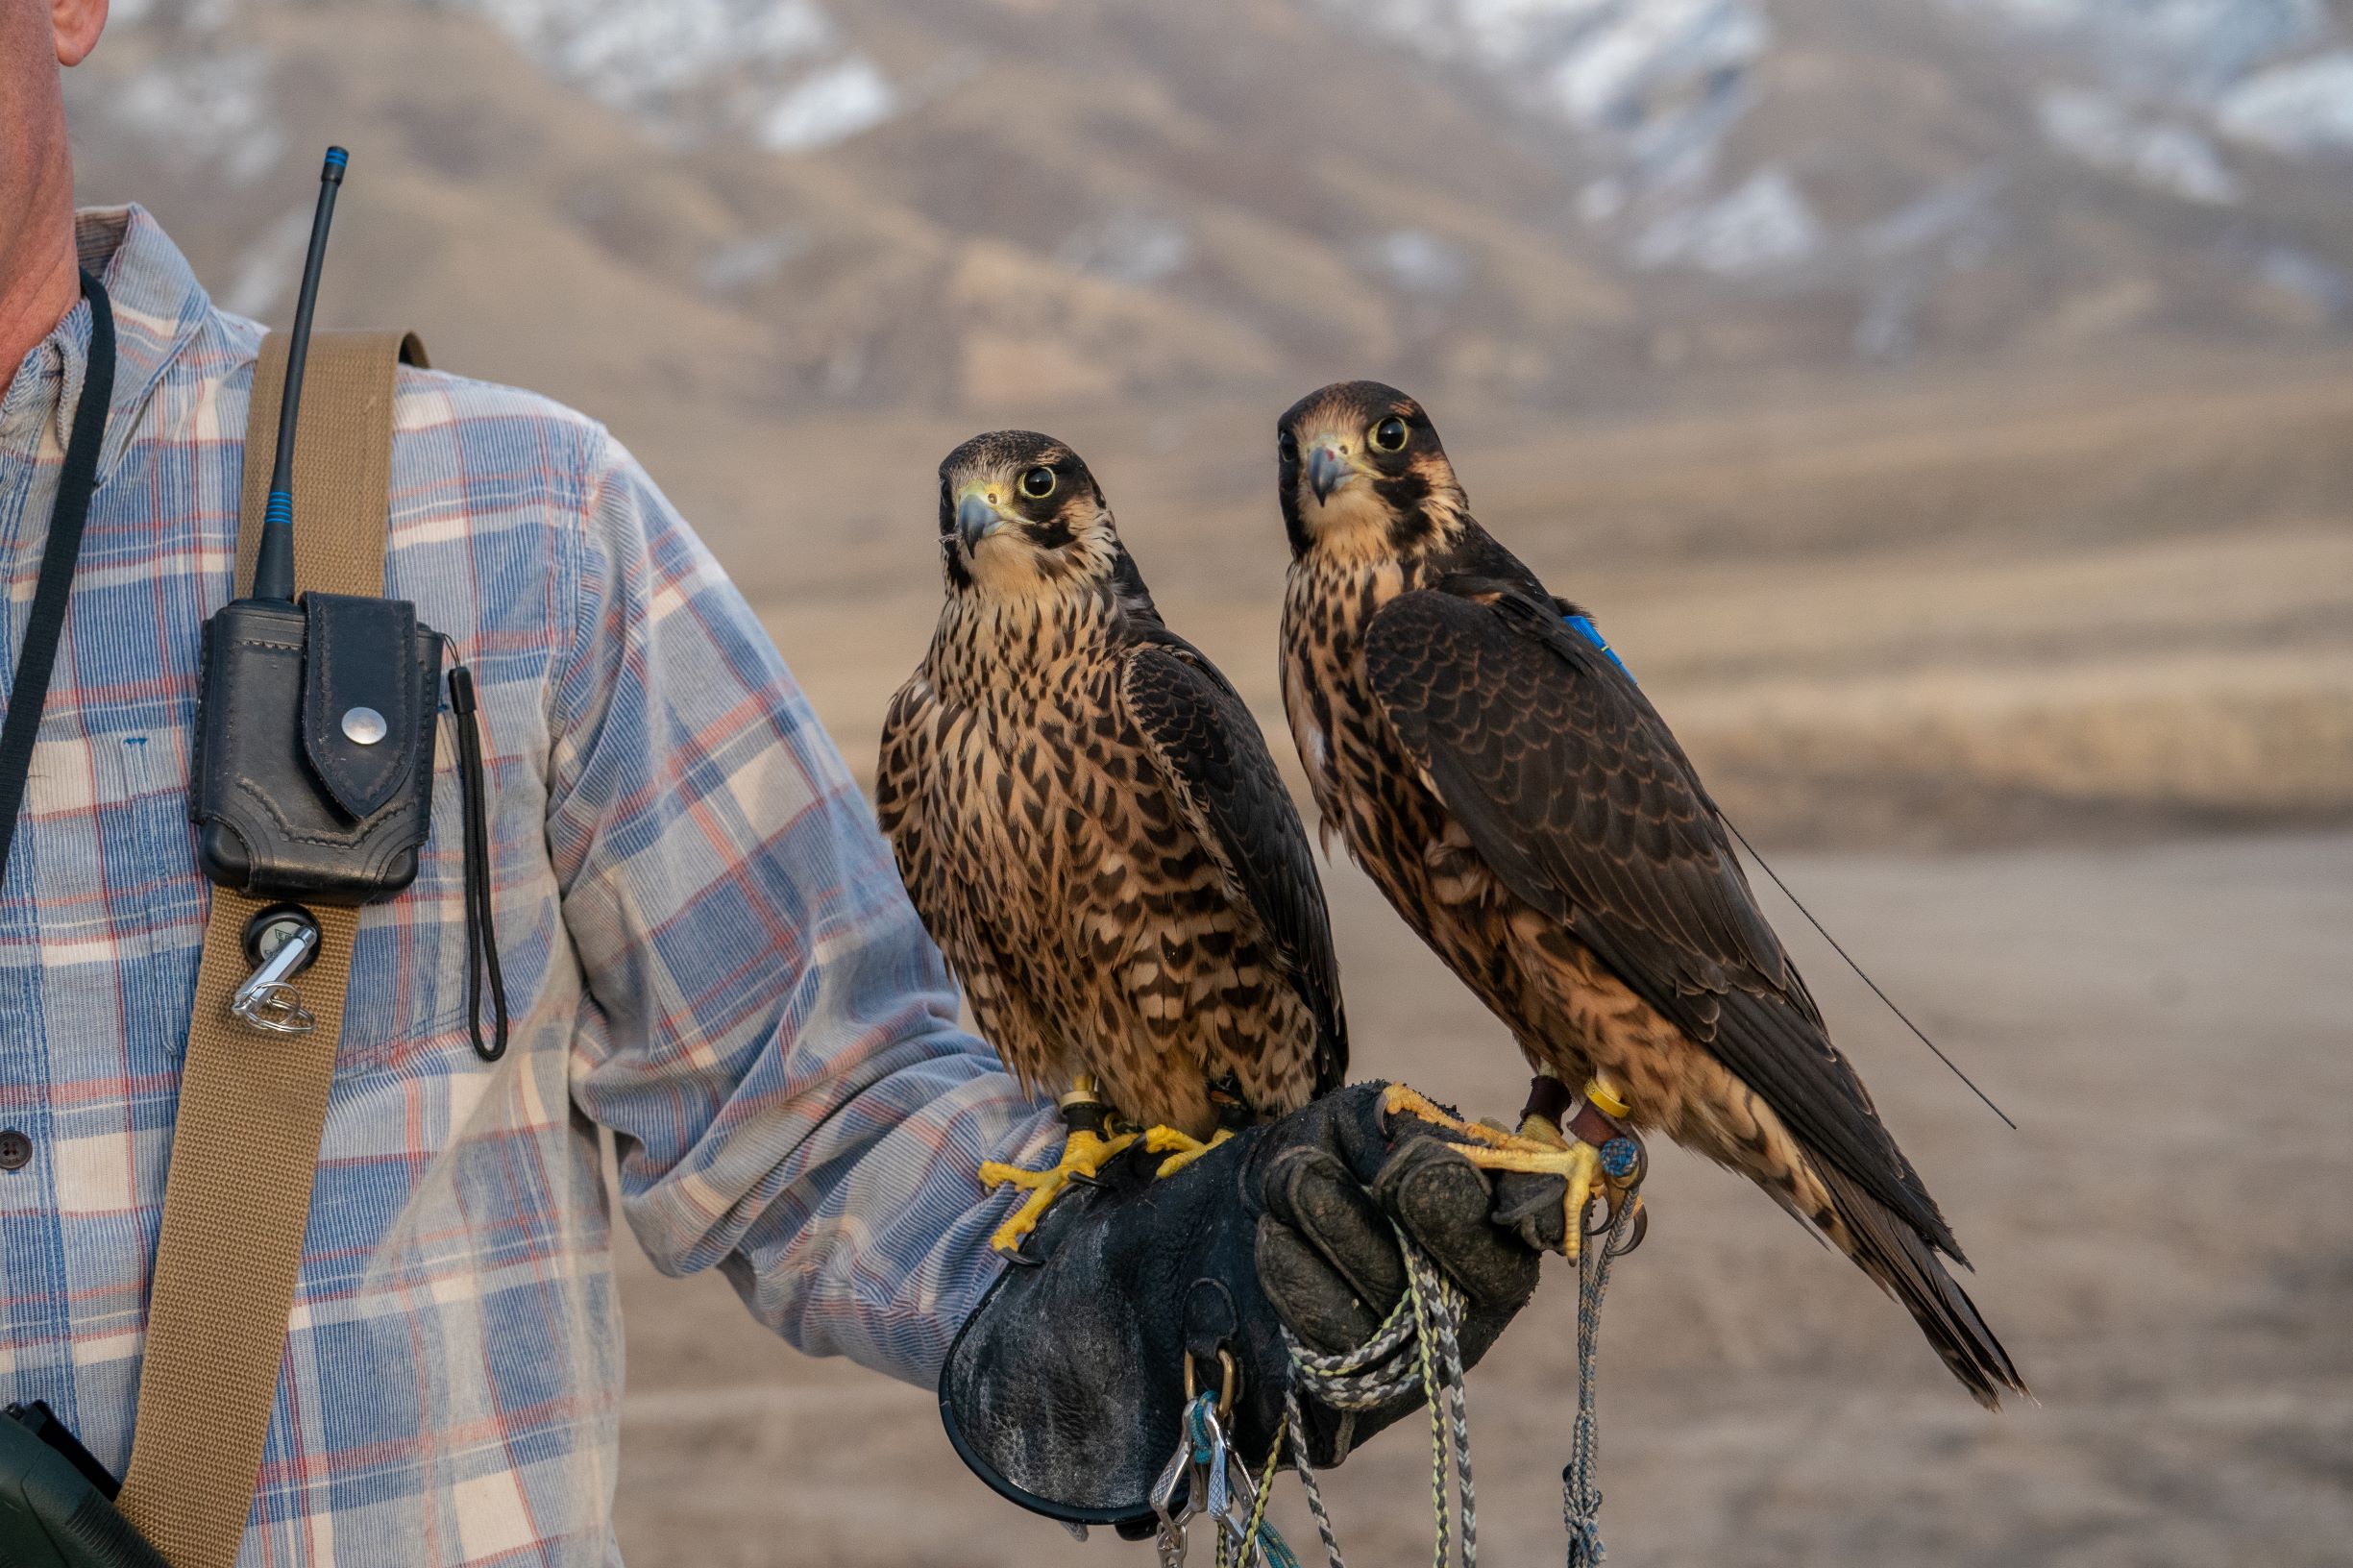
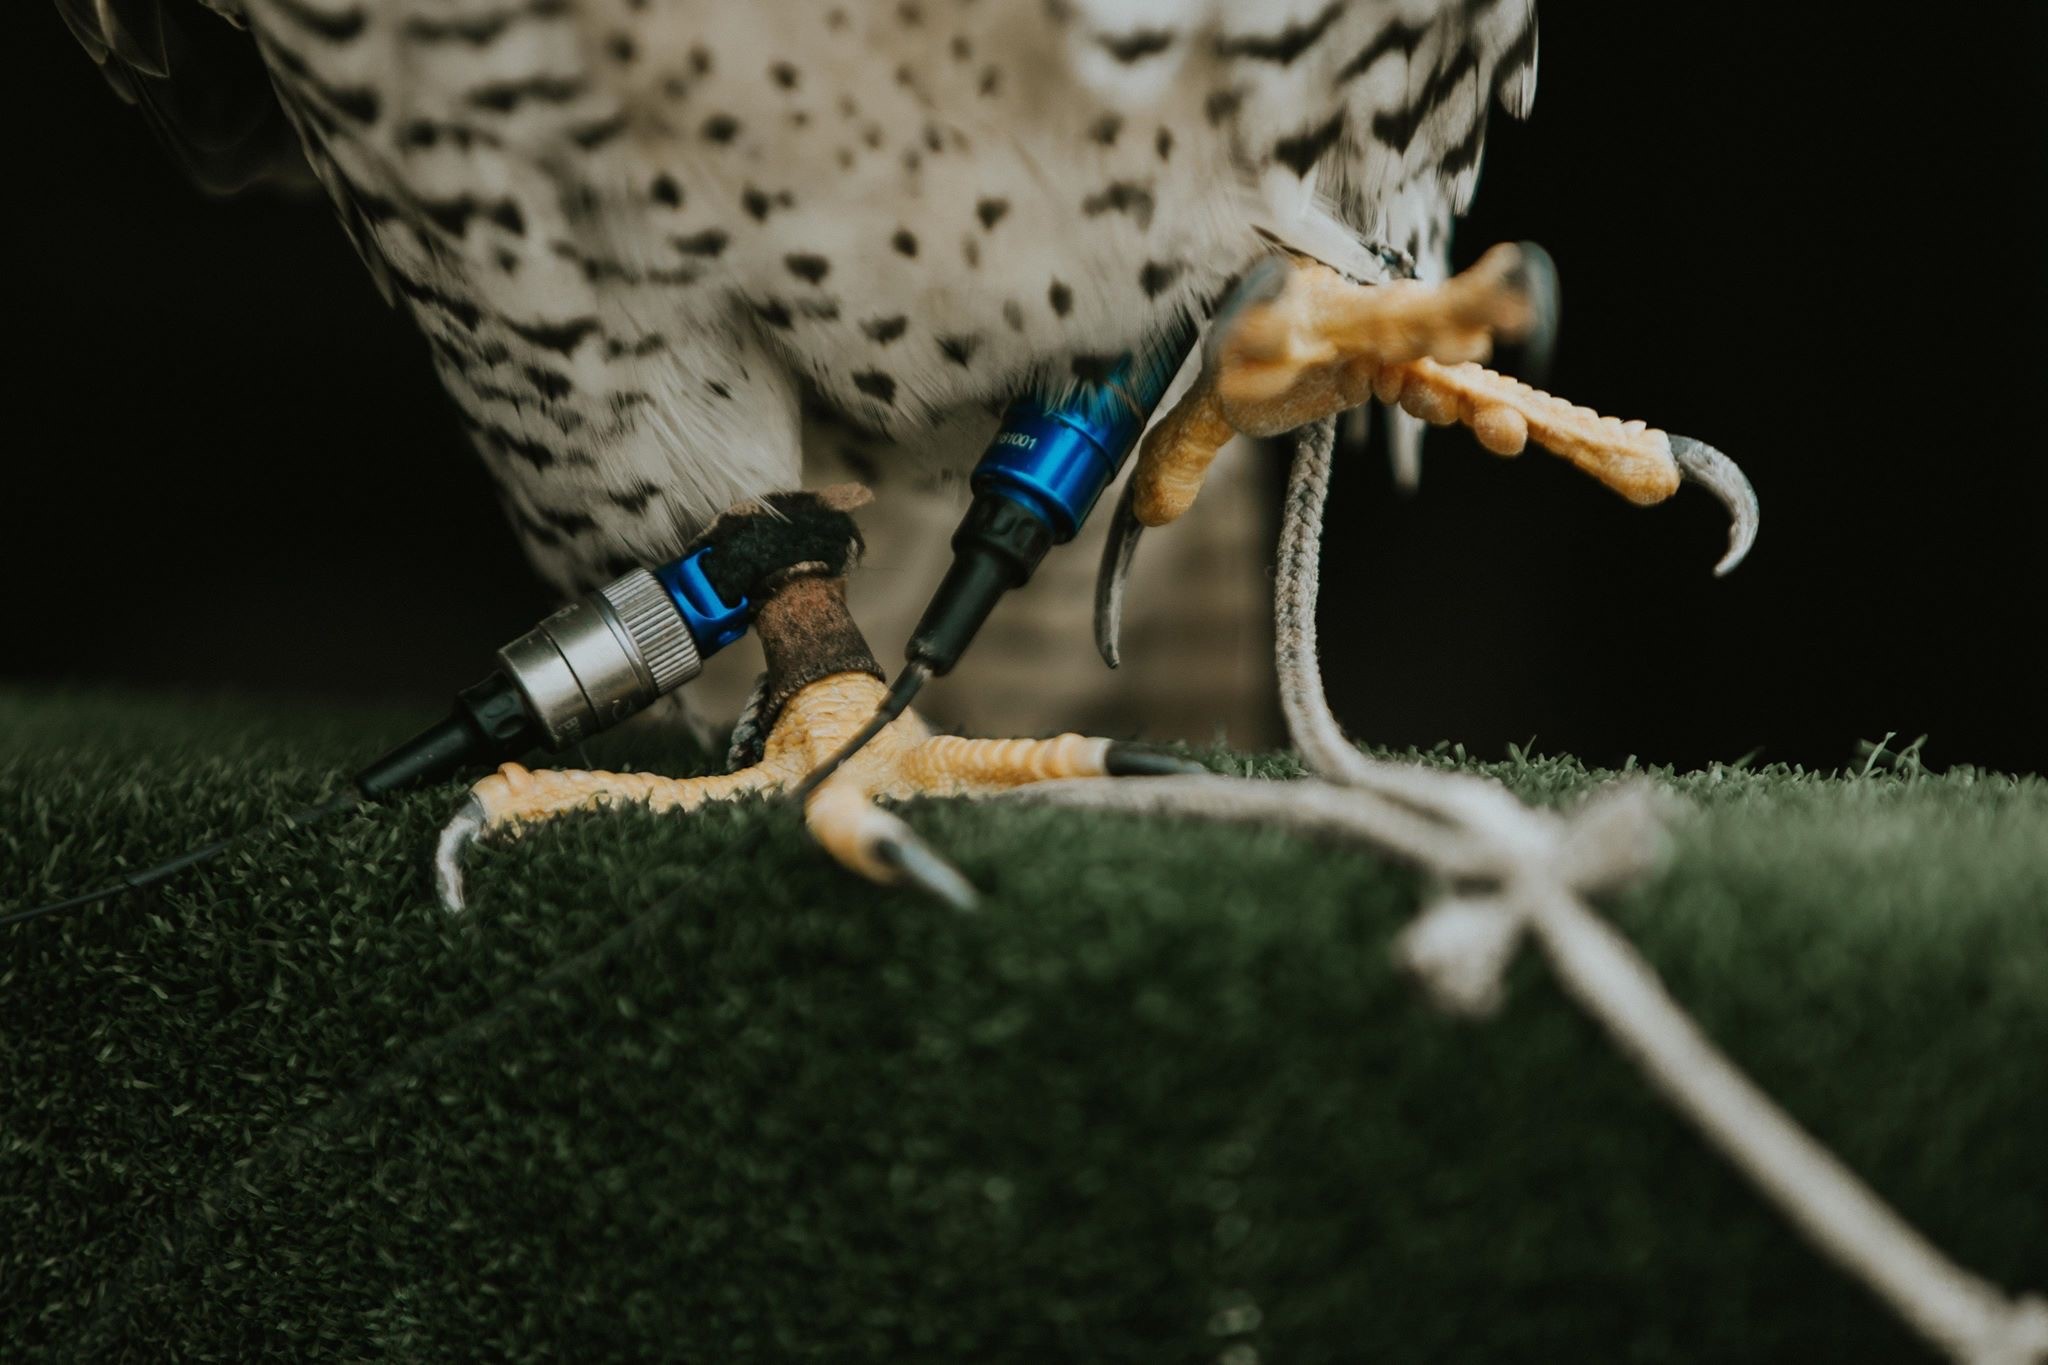 Leg (tarsus) Mounts were the first to be used by falconers and are still by far the most common method used here in the America and throughout Europe. The user simply makes a leather Bewit of the right size and shape to fit his bird, similar to what is used to attach bells to the legs of hawks and falcons. This is attached using a loop already manufactured into the design of the transmitter. It’s important to cross the leather back through itself after passing through the transmitter attachment so that no metal edges come in to direct ontact with the bird’s leg. The Bewit is then wrapped snugly around the leg above the anklet. The Leg Mount is almost always attached and removed with each flight.
Some falconers attach Leg Mounts to their birds using the grommet of the Almeyri anklet by means of a small plastic zip-tie. This technique carries the risk of having the zip-tie snap off at the tight bend in cold temps. It is possible to find low-temp rated ties however.
Advantages of the Leg Mount:
It’s Secure. Proponents say a leg mount is far more secure and cannot accidentally come off in the field. “If you always want to get your bird back, use a leg mount.” The Bewit method of attachment, when doubled back properly over the button, is a time tested and proven design.
The leg is a good place to carry weight. It is argued that since birds are designed to carry weight with the legs, it’s a more natural place for any extra weight to be attached. It’s Easy to get on and off. Although some birds are touchy with their feet, most readily accept the bewit attachment going around the leg prior to flight without a fuss.
It’s Simple. There’s nothing complicated about the leg mount. The leather Bewit attachment method has been used for centuries and anyone can make their own.
Disadvantages and Risks:
Serious injury is possible. Dislocated joints and leg injuries have occurred from collisions with quarry, wire fences or passing other obstacles in the field at high speed. Toe injuries are also a risk with hard-hitting falcons.
For a bird that lands on a powerline, it’s the most prone to electrocution. Shorter antennas have help with this risk, but fatalities still occur due to transmitter antennas hanging down from the feet and creating contact.
Critics say the leg mount handicaps the hunting bird. When two leg-mount transmitters, bells and nametags are all used, a bird can scarcely get their feet tucked up when in flight, and one can only imagine the wind resistance and effort in pulling them out at the bottom of a stoop. Many are convinced a bird that is reluctant to hit quarry will overcome this when the impediments are removed from its feet. One vocal opponent put it this way: “How would you like to run a race with license plates tied around your ankles?”
It’s the worst broadcast position of all mounting options. When the bird is on the ground, so is the transmitter and its antenna, significantly reducing the signal output. Worse still, it may be lying with the antenna pointed straight at you, in which case you get almost no signal at all (the null).
Other raptors think your bird is packing something. Your falcon or hawk can be mobbed or harassed by a harrier, ruining the flight, chasing them out of the country or worse.
It’s easier for a bird to “work on.” A lost bird can get much more leverage on a leg mount transmitter during idle hours. With the old-style transmitter designs, the tape or sleeve can be ripped off and the batteries removed, turning off the transmitter. While this is not possible with the canister design, it’s still possible for an idle bird to ruin or destroy the antenna or remove the bewit and transmitter before you find them again.
Marshall transmitters that can be ordered as a Leg Mount include: the RT+, Scout, and Micro.
The current springmount used was designed by by two innovative Californians, and the tail mount method employs a small tailpiece permanently affixed to one of the deck feathers (which is a mental leap some still cannot make). The tail mount version of the transmitter has a spring with small hooks as part of its design, which is inserted into the tailpiece. It can be taken on and off with each flight, or if the transmitter has a magnetic tap on/tap off switch, it can be left on the bird, and removed only when it’s necessary to change the batteries. Nearly all falconers in the Gulf countries use tail mounts. With the advent of shorter antennas, flat transmitters, and improved installation tools and pieces, the tail-mount is being used by an increasing number of falconers in American and Europe as well.
Advantages of the Tail Mount:
- Keeps feet unencumbered. Proponents like how this frees up the feet and stays safely out of the way when contact is made with quarry. With the feet properly tucked up, the bird is less likely to be harassed by another raptor. Having a single light weight transmitter on the tail seems to have little effect on a hunting falcon’s flight or maneuverability.
- Better broadcast position. The transmitter is higher up and will always give a better signal when the bird is on the ground, since the transmitter antenna will be in a 45 degree position so that the signal is broadcast outward in a 360 degree radius.
- Can be very easy to get on and off (with some birds). Assuming it’s acclimated to being touched at the base of the tail (a process similar to hood training), the bird will hold still while the tail mount is quickly installed before use.
- Aesthetically pleasing. When using any one of the new flat transmitter designs with short antennas, the tail mount is visually out of the way and much less noticeable.
Disadvantages and Risks:
- A deck feather can be pulled out. While most accidents with this method occurred years ago when all transmitters had long antennas, it is still a risk today. Some people using 151MHz tail-mounts had an 18-inch long wire dangling from underneath the feather so antenna wrap was inevitable. But even with today’s short antennas, birds can still have a deck accidentally pulled out in a struggle with quarry as the transmitter is inadvertently pushed or pulled. And if there’s sufficient trauma to the follicle, the feather may never grow back. Sometimes, inserting a plug (the top part of the feather) back into the follicle allows it to properly heal and a new feather grows in during the molt. Some proponents still say, “better to lose just a feather than have a broken leg or neck injury.” For lightest weight, we recommend using the Micro tail mount since it is just 3.5 grams. One innovative idea originated by Ray Gilberston (MT) is to install a tail piece on each deck feather side-by-side to better distribute the weight of a 8-9 gram 1/3N sized transmitter by inserting one hook into each tail piece.
- Can still possibly come off. Although the current design comes very close, no one has yet designed a tail mounting system that can be easily installed and removed regularly by the falconer yet guaranteed not to come off under any other circumstances. Some birds work on them and find a way to preen them out. Certain high impact instances in the field have left the transmitter lying in the grass. Using the right sized tail clip is certainly a key to the design.
- Can be difficult to use. Some birds don’t like to be touched in that spot, and it can be nearly impossible to get a transmitter on or off without casting the bird first. Getting a tail-mount on a touchy bird just before a flight can be aggravating, with both you and the bird now angry as the hood comes off. However, with the advent of the Tap On/Tap Off mag switch, a transmitter can now be left on the bird an activated just prior to the flight with no fuss or battle at all.
- Some birds won’t tolerate them. Some birds never get used to the weight of something on the tail feather and will continue to preen at it, sometimes removing the transmitter or actually destroying the feather.
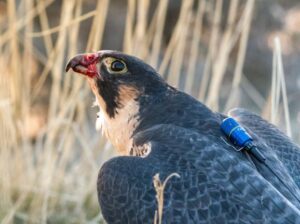
Falconers using a neck mount tie an elastic band or other stretch material to the Bewit attachment on the lid of the transmitter, and put it over the head of the hooded bird just before the flight. The transmitter hangs on the chest, or is sometimes preened back over the shoulder. In the late 70’s a number of well-respected falconers first used neck mounts, and many followed. They eventually ceased being used by many due to accidents with the longer antennas of the time. However, with the smaller transmitters and shorter antennas of today, a number of falconers are still using the neck mount (breakaway) method, which also allows them to free up tand protect the feet.
Advantages of the Neck Mount:
- It’s very simple. Proponents like having the feet free of entanglements for all the reasons listed about leg mounts.
- Better broadcast position. The transmitter is up off the ground and will give a better signal when the bird is on the ground, usually in a near vertical position, which is ideal since you will get a signal in all directions.
- Can be quick to get on and off (with some birds). Proponents like how fast they can put the neck mount on just prior to use. It’s also easily pulled out and cut off as the bird is concentrating on feeding.
Disadvantages and Risks:
- Severe Injury or death. If anything but a short, stiff antenna and proper breakaway material is used (#16 rubber band), your bird could be decapitated by antenna wrap on quarry or a wire. One caution with rubber bands: they can degrade quickly if not changed frequently. Also, they are easily bitten off by the strong beak of a lost bird with idle time to focus on it.
- Some birds won’t tolerate them. As soon as they have an idle moment, they may pull on the antenna and try to get the transmitter off. Some falconers have come out to find their bird on the block with the transmitter and stretch band lodged in their bird’s gape or a toe through the loop pulling the bird’s head down and causing a panic event (for both of them).
- It’s hanging in front where all the activity is. Unless quickly removed, it gets in the way while feeding or struggling with quarry, and it’s possible for a bird to accidentally grab the antenna and then panic as she pulls against it, deteriorating into a tantrum. Like the leg mount, you may be replacing curled antennas more often because of this. It’s also right in the path of potential high impact with quarry, possibly injuring the chest. Since we are not able to see its effects in a long stoop, it’s also not known if the antenna is whipping the feet or legs at high speeds.
Overview
The Backpack harness uses a small smooth mounting plate that accepts the springs of a tail mount transmitter while protecting the bird from direct contact with it. It is held in position on the back of the bird by flat Teflon tubular ribbon, which wraps once around the bird’s body and under the wings in a figure eight pattern. Like a hood, it needs to be carefully fitted to each individual bird. Once installed, the Harness is preened in to the feathers where it is not seen and is left on the bird for the entire season or for multiple seasons. The transmitter then attached and then rides on the back, up between the shoulders. While the harness stays on the hawk, the transmitter can be attached before each flight, or left on until batteries need to be changed, just like a tail mount.
Advantages of the BackPack:
- Good broadcast position. Being higher off the ground, the same as the neck-mount, means better broadcast position at all times when your bird is on the ground.
- Easy target for mounting. Placing or removing the transmitter is fast and simple. Birds are less sensitive to touching on the back and shoulders than to the base of the tail. The connection is always easy to find and see.
- Safest position on the body. High on the back and between the shoulders is the furthest point from any contact with quarry. Up and away from possible contact with power lines makes it the least likely spot for electrocution accidents (better than both leg or neck mount in this regard). It also leaves the feet completely free and unencumbered.
- Ascetically pleasing. With a flat design/short antenna, the transmitter practically disappears from view. The harness is preened into the feathers, so the risk of it getting hung up on something is extremly low.
- Convenient. There is no need to re-install each year as there is with the tail mount, and it can be used on young birds or at hack before they’re hard penned. The harness can be left on year-round, and the Teflon ribbon has proven strong and safe on wild birds for many years.
Disadvantages and Risks:
- If the fit is wrong, injury could result. A fitting that is too tight on a bird that is adding muscle through the season can cause irritation. A loose fitting harness could be exposed outside the body feathers and snag on something at high speed, or even hang a bird. If low grade materials are used (nylon ribbon or strings, handmade plastic mounting plates with sharp edges), injuries have been reported.
- Some birds will not tolerate it. Most commonly, if the fit is not right, either too loose or too tight, the actions of the unhooded bird will let you know rather quickly. The harness should be removed and replaced again, taking care to get the fit right. There’s a small number of birds that for whatever reasons, will not accept the backpack after installation regardless of fit and the harness has had to be removed altogether.
See “How to Install BackPack Seminar” here.
See “How to Install BackPack on a Pigeon” here.
Decisions
As should now be clear, there is a lot to consider regarding which mounting method to use for attaching your transmitter. Of the 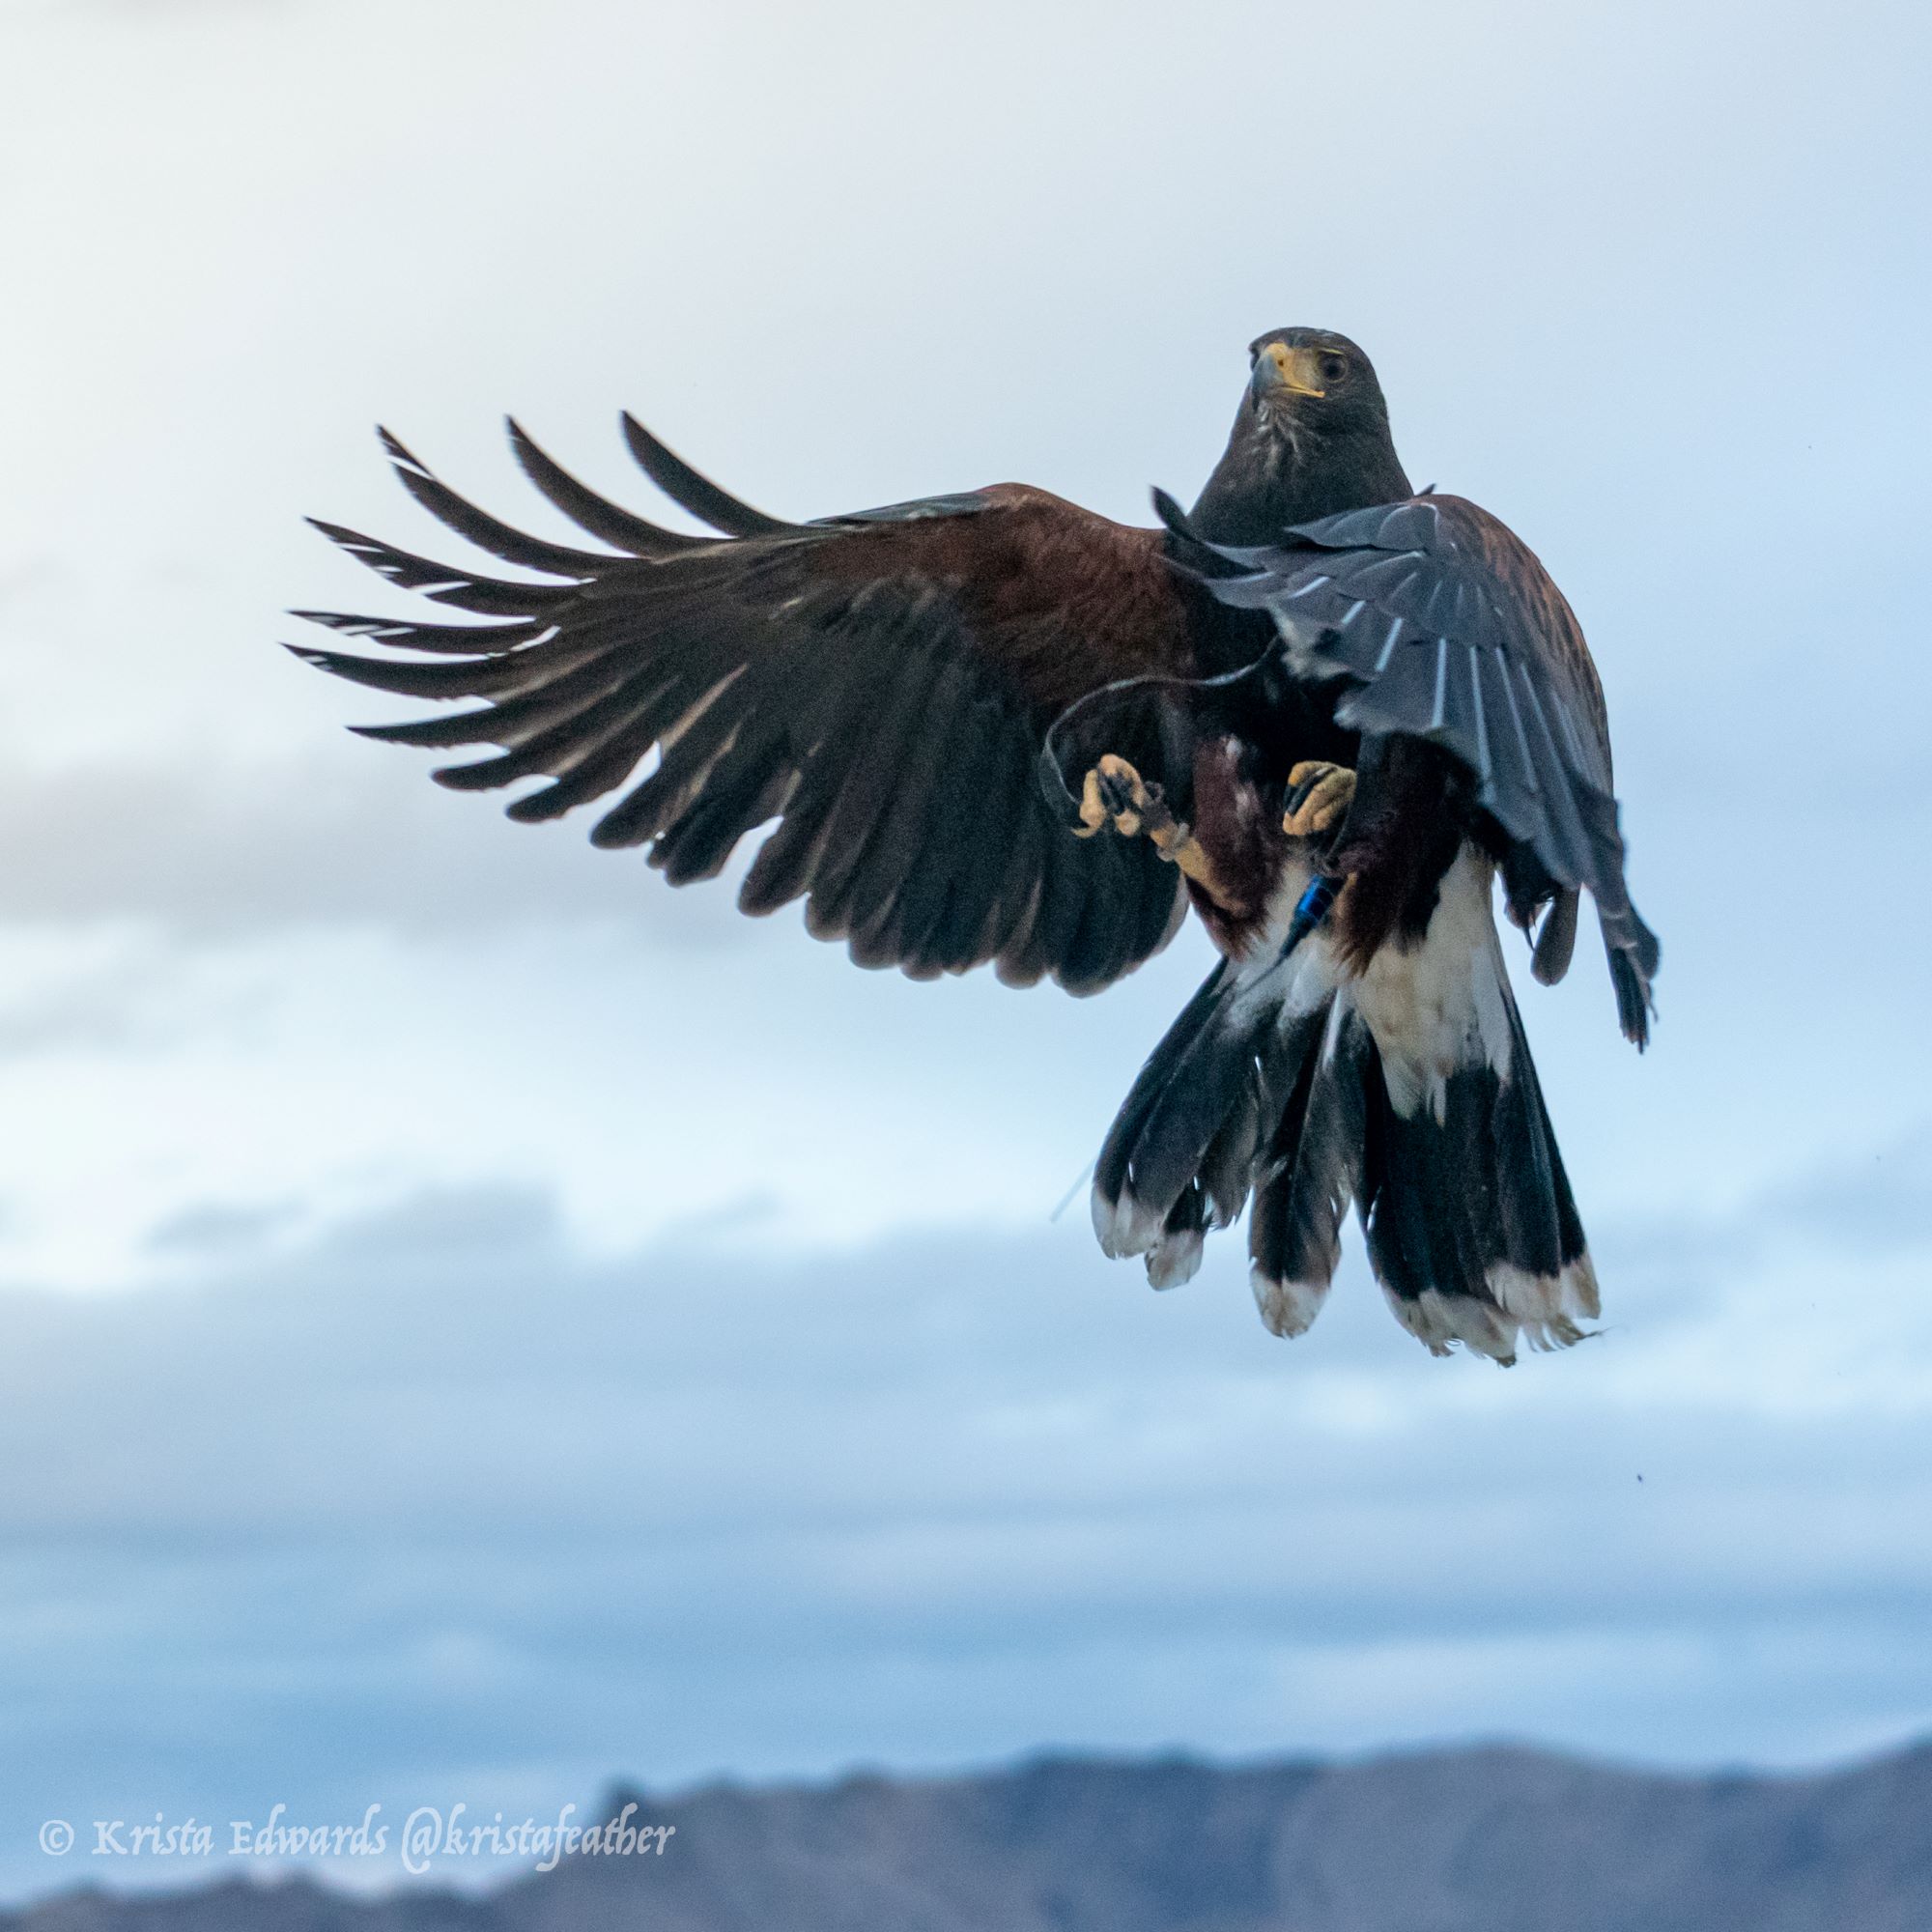 many issues to remember, the most important priority is this: your decision should be based first and foremost on the safety of your bird, then performance and lastly, it’s convenience for you.
Most falconers today fly with two transmitters, as a safety precaution in the same way SkyDivers have two chutes, or cars always have two headlights. Even though transmitters have become so reliable you could almost use only one nowadays, there are still many ways for things to go wrong in the field. And one of them is having a perfectly good transmitter come off in the field due to a failure of the mounting method.
Therefore, it’s wise to have redundancy in your mounting methods also by using two different methods on the same bird. Instead of two tail mounts, you can use a leg and a tail mount. Instead of two leg mounts, try using one leg mount and one tail mount.
In our opinion, the ideal set-up for most all longwings flown in America is the combination of a PowerMax with a TrackPack and a Micro on the tail. This gives all the benefits of having two dorsal mount designs, with your primary transmitter being very long range and the back up transmitter being very small and light.
The ideal set-up for the large shortwings, in our opinion, is using a Scout on the TrackPack or tail. For the smaller birds, the Micro.
So, in addition to selecting just the right transmitter for the type and size of bird you’ll be flying, take a moment to carefully consider the mounting methods you use. Redo or use the best leather for those bewits on your leg mounts, making sure they are snug. Use the lightest, flatest transmitters for tailmounts together with the most secure tail-pieces. Search out the exact size and weight of the neck mount elastic band. Get help in installing the TrackPack harness to ensure the right fit. Don’t scrimp by using old, uncertain batteries. In short, honor your bird by not tolerating poor equipment to be attached to her in dangerous ways. All this helps your telemetry to stay out of the way and not intrude on your hawking experience, yet it will always be there and working reliably for you whenever you need it.